Before we take a look at this chart, we need to know the track layout of the station—it is, as far as I know, Steyrling on the Pyhrnbahn (the line from Linz to Selzthal). On the right side of my lever frame, there is no lever for a distant signal, so I have to assume this signal was missing—although I actually cannot believe this: After all, this is and was always a main route, which would have been equipped with signals for running more than 40kph. However, as the lever for A only moves by 90° (up or down, depending on the number of arms), it is also impossible to connect a distant signal to the same lever (as would have been possible with German "Einheitssignale")—the friction in the long wire line would have been too large. The last possibility that comes to mind is a colour light distant signal that is controlled by arm contacts on A:
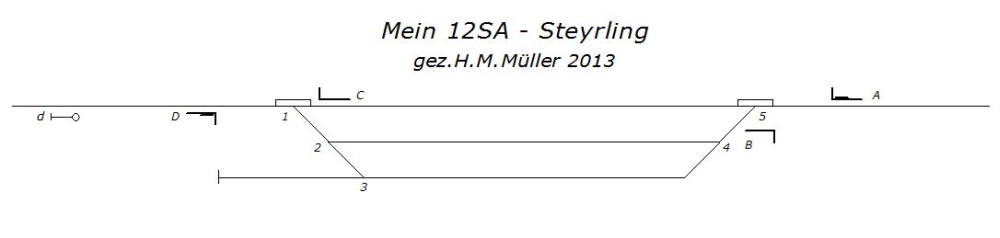
At sporenplan.nl, the track layout of Steyrling can be seen in this track plan.
And here is the locking chart for my lever frame (click on it to view it as readable PDF):

No comments:
Post a Comment